Love it or hate it, PowerPoint is essential when it comes to business presentations. Whether you’re creating an audit report or updating a pitchbook or portfolio review, PowerPoint is usually the tool for the job.
However, creating slides in PowerPoint can often be time-consuming. A study we conducted found that 90% of finance professionals spend up to two hours a day in PowerPoint.
If this sounds familiar, you’ve come to the right place! Read on to discover 10 PowerPoint tips and tricks to save time on your next presentation.
Use Keyboard Shortcuts
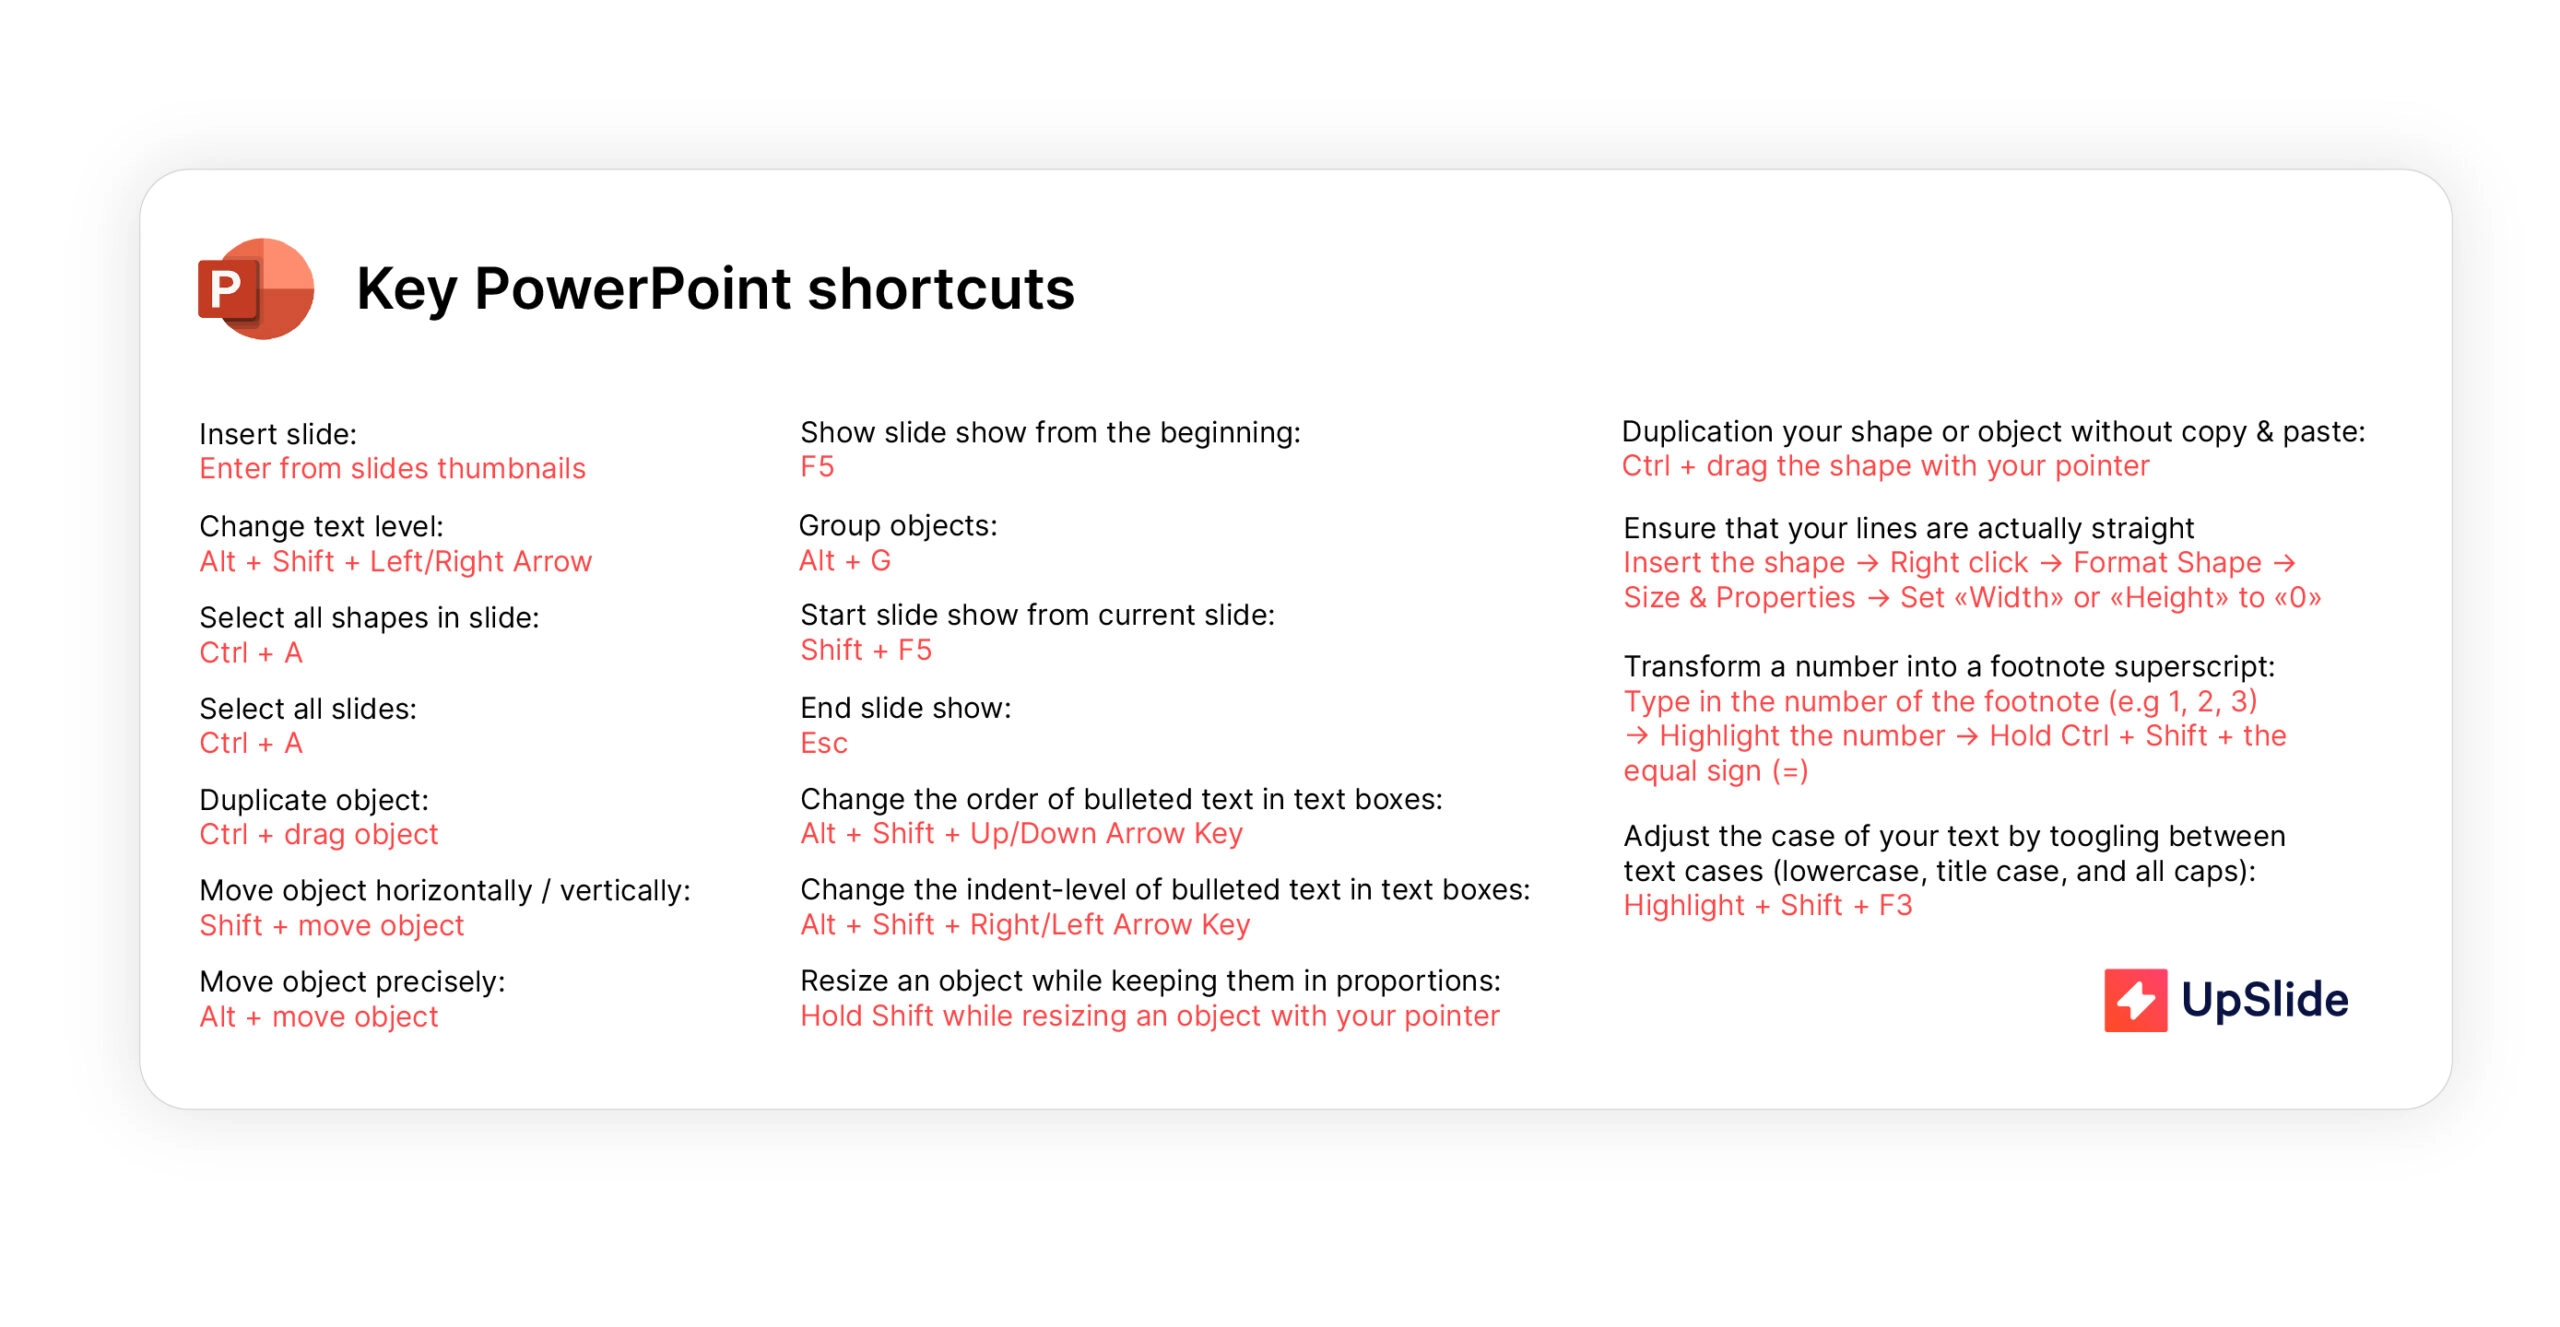
Do you often find yourself scanning your PowerPoint toolbar to find a specific function? Make use of keyboard shortcuts to work smarter in PowerPoint. We’ve compiled a few of the most useful shortcuts below. Once you master these, you’ll be able to create flawless presentations in PowerPoint much faster.
Customize Your Quick Access Toolbar
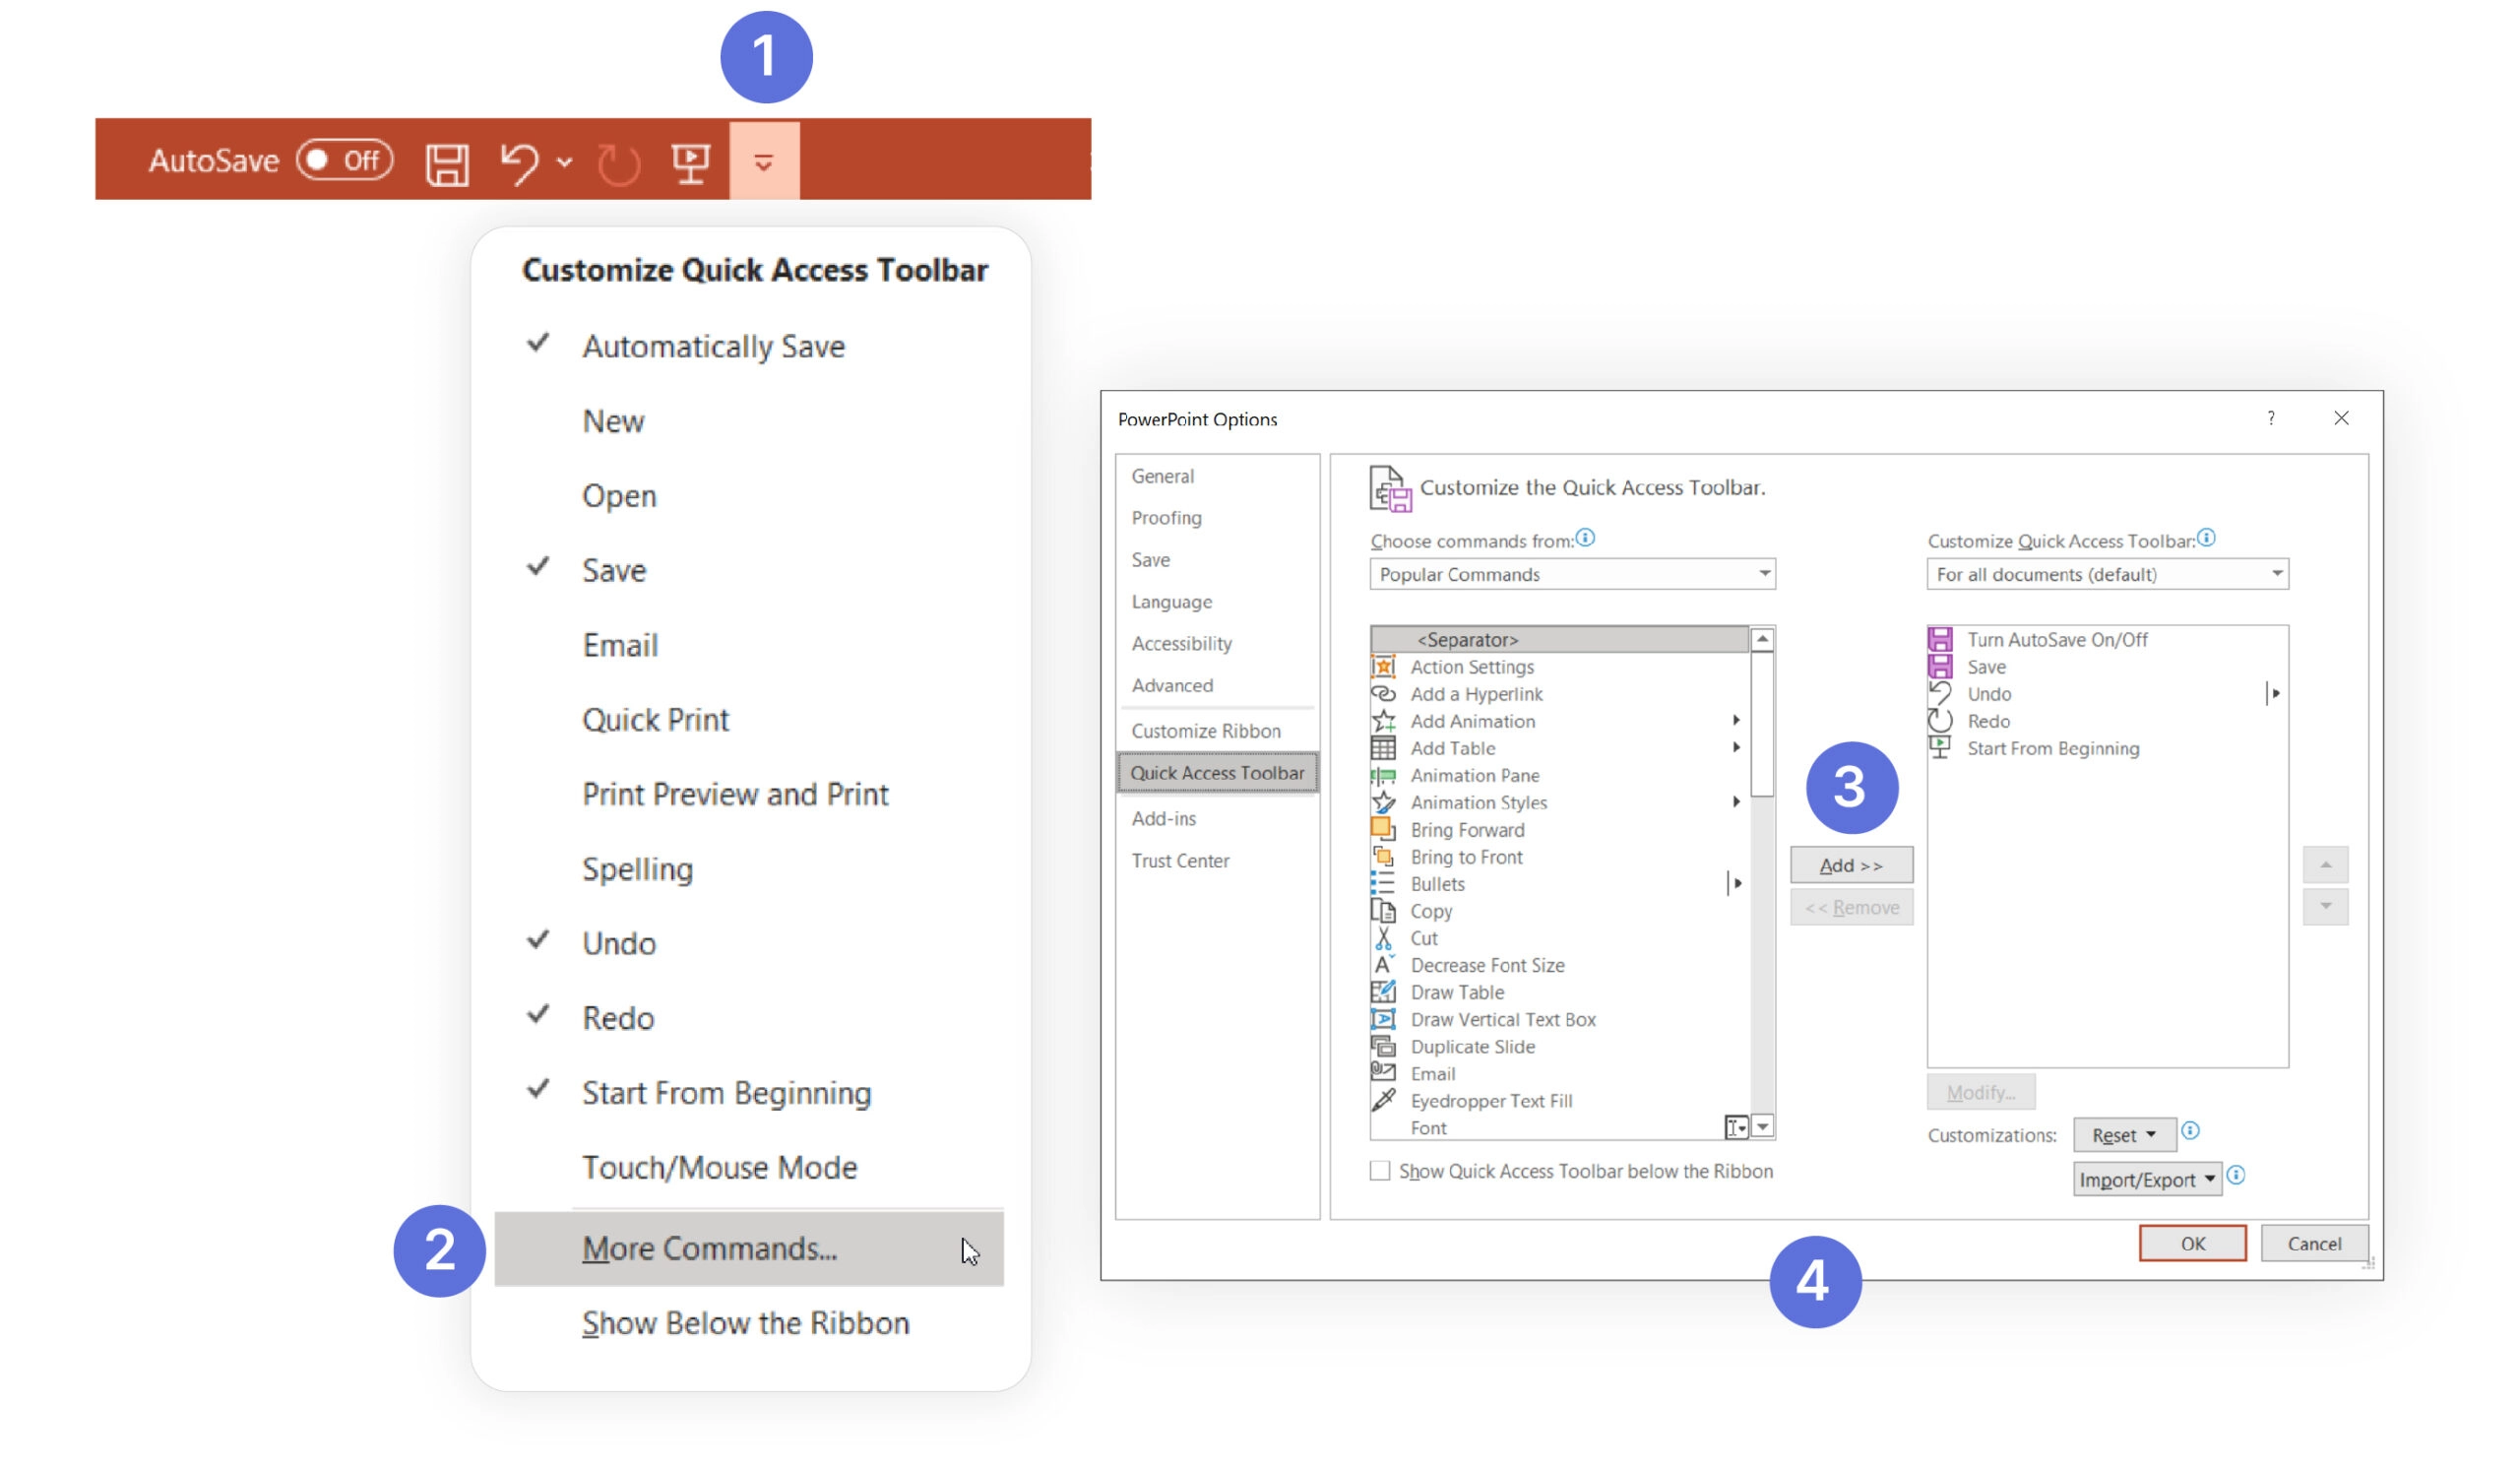
Building your Quick Access Toolbar is a great PowerPoint trick to quickly navigate your most-used features. It is a customizable toolbar that sits above the ribbon, where you can add your favorite and most-used commands. It takes minutes to set up, plus it’s easy to edit if your top features change.
How to use the Quick Access toolbar:
Simply click the white downwards-facing arrow at the top of the PowerPoint window. Then, click More Commands, where you can choose your desired functions from the menu. If you want to remove any commands, select the command and hit Remove.
Resize Multiple Objects or Shapes at Once
Want to resize multiple images on your slides all at once? If so, this is the PowerPoint trick for you. With the Group function, you can resize and fit multiple objects without distorting their original proportions and shapes.
How to use the Group function in PowerPoint:
Select your desired objects. Then, group them together with the shortcut ALT + G. To adjust the size, hold SHIFT and drag the corner of the box.
For UpSlide users, the Arrange, Swap and Smart Painter features can also help you format and organize your shapes and images in one click.
Discover UpSlide’s Formatting Features >
Identify and Match Exact Colors
Have you ever struggled to match the theme of your presentation to a client’s brand identity? If so, this cool powerpoint trick can prove invaluable.
Eyedropper is a handy PowerPoint tool that can help you homogenize your presentation’s color scheme. It quickly identifies any color on your screen and applies it to the text or object you are trying to change.
How to use Eyedropper in PowerPoint:
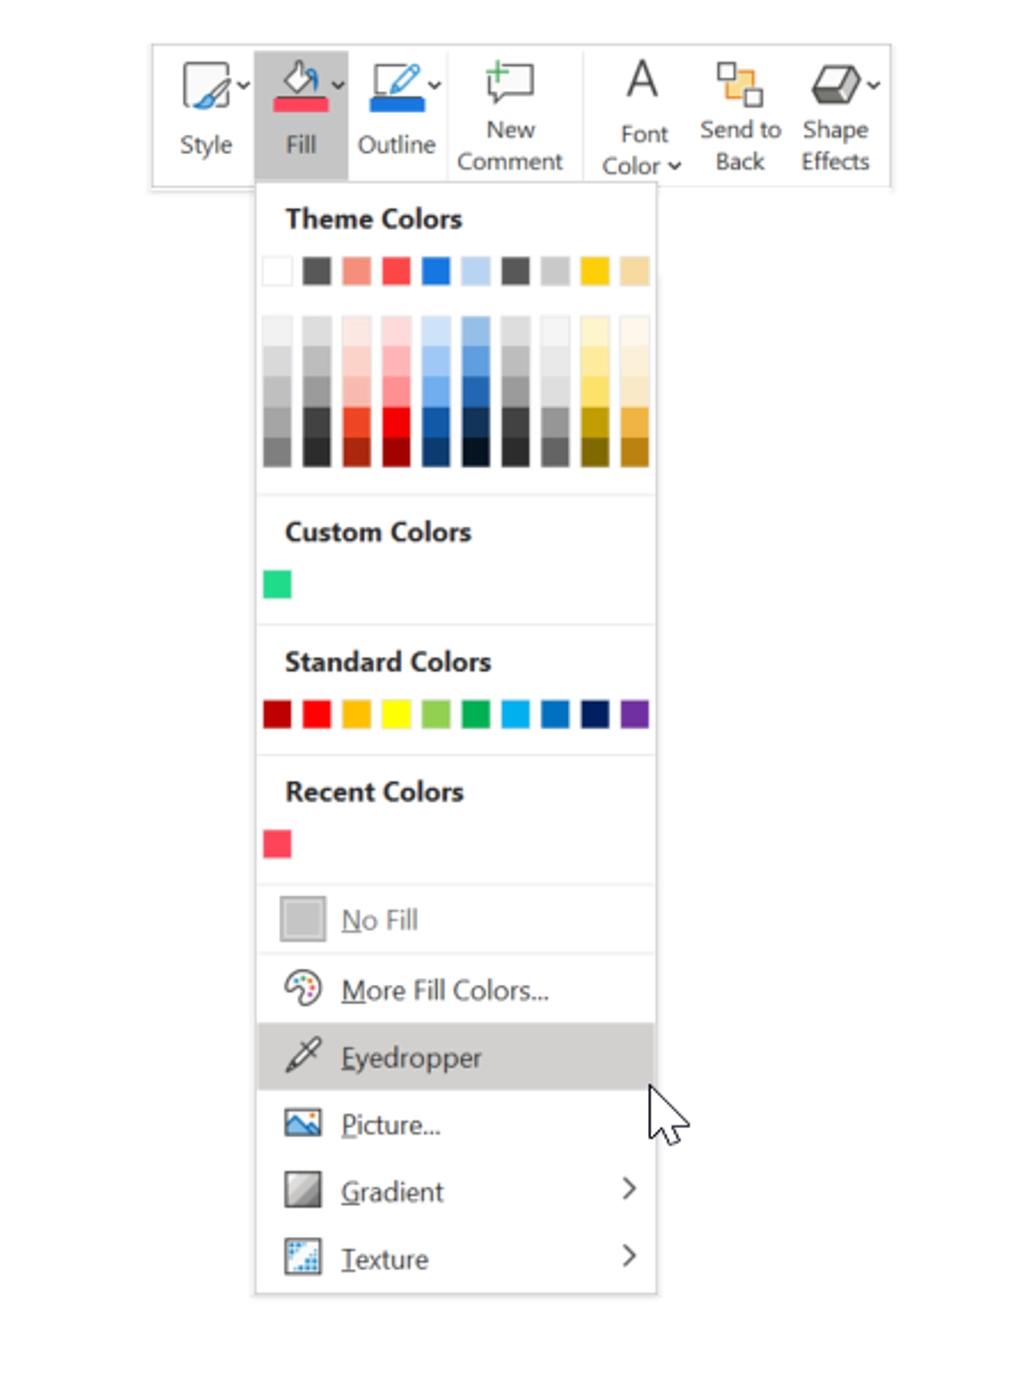
Right-click on the shape you want to change, click on Fill or Outline, then select the Eyedropper tool. Using the Eyedropper tool, click on the color you want to copy. Just like that, your shape will be the same color as the client’s logo!
If you are regularly editing presentations to fit clients’ branding, UpSlide’s Slide Converter can help you do this in minutes.
Discover UpSlide’s Slide Converter >
Fit Text into a Shape
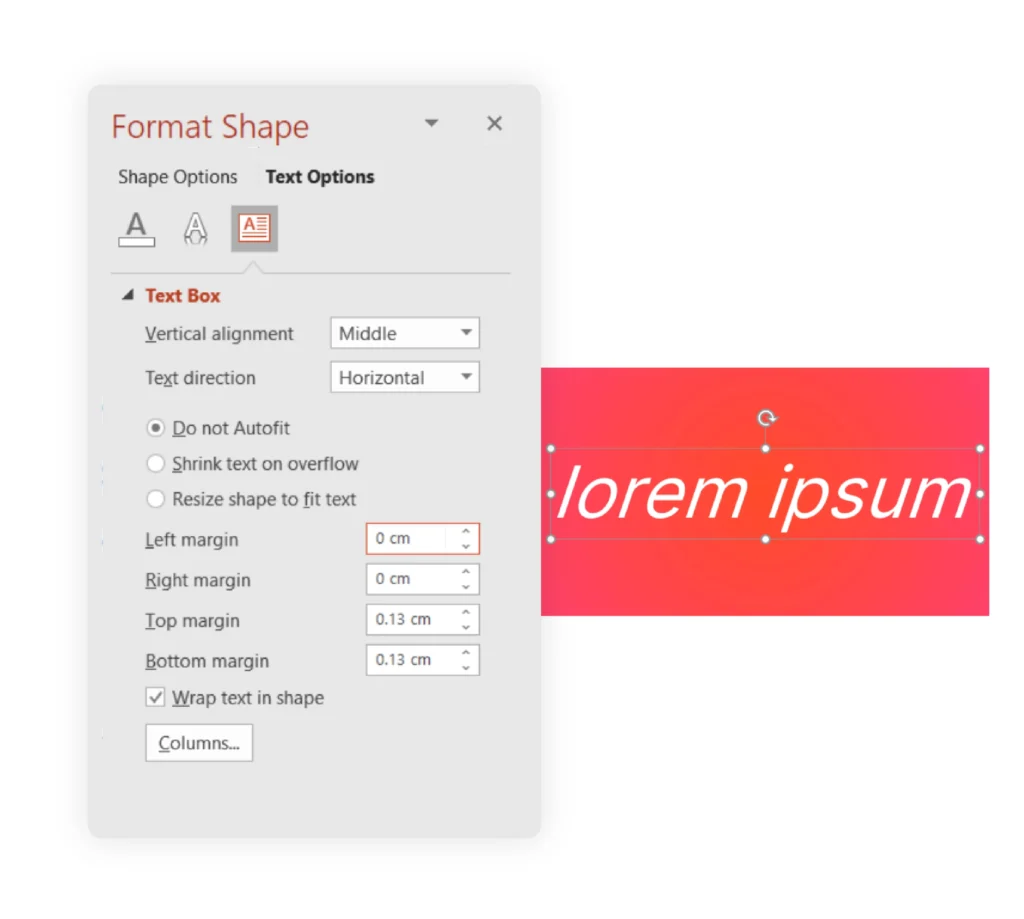
Ever tried adding text to a shape only for it to split into multiple lines? There are some great PowerPoint tricks to prevent this. Here are two ways to solve this without wasting valuable time:
- Option 1: Right-click on the shape and select Format Shape. Change the text margins to 0 from the left, and 0 from the right. Nine times out of ten, this will solve your issue.
- Option 2: Insert a text box over the original shape and type directly into that. The text will show up over the shape and you will be able to easily change the size, orientation, and form of the text box. Group the text box and the shape together to arrange them within your slide.
Automatically Generate Lorem Ipsum Text
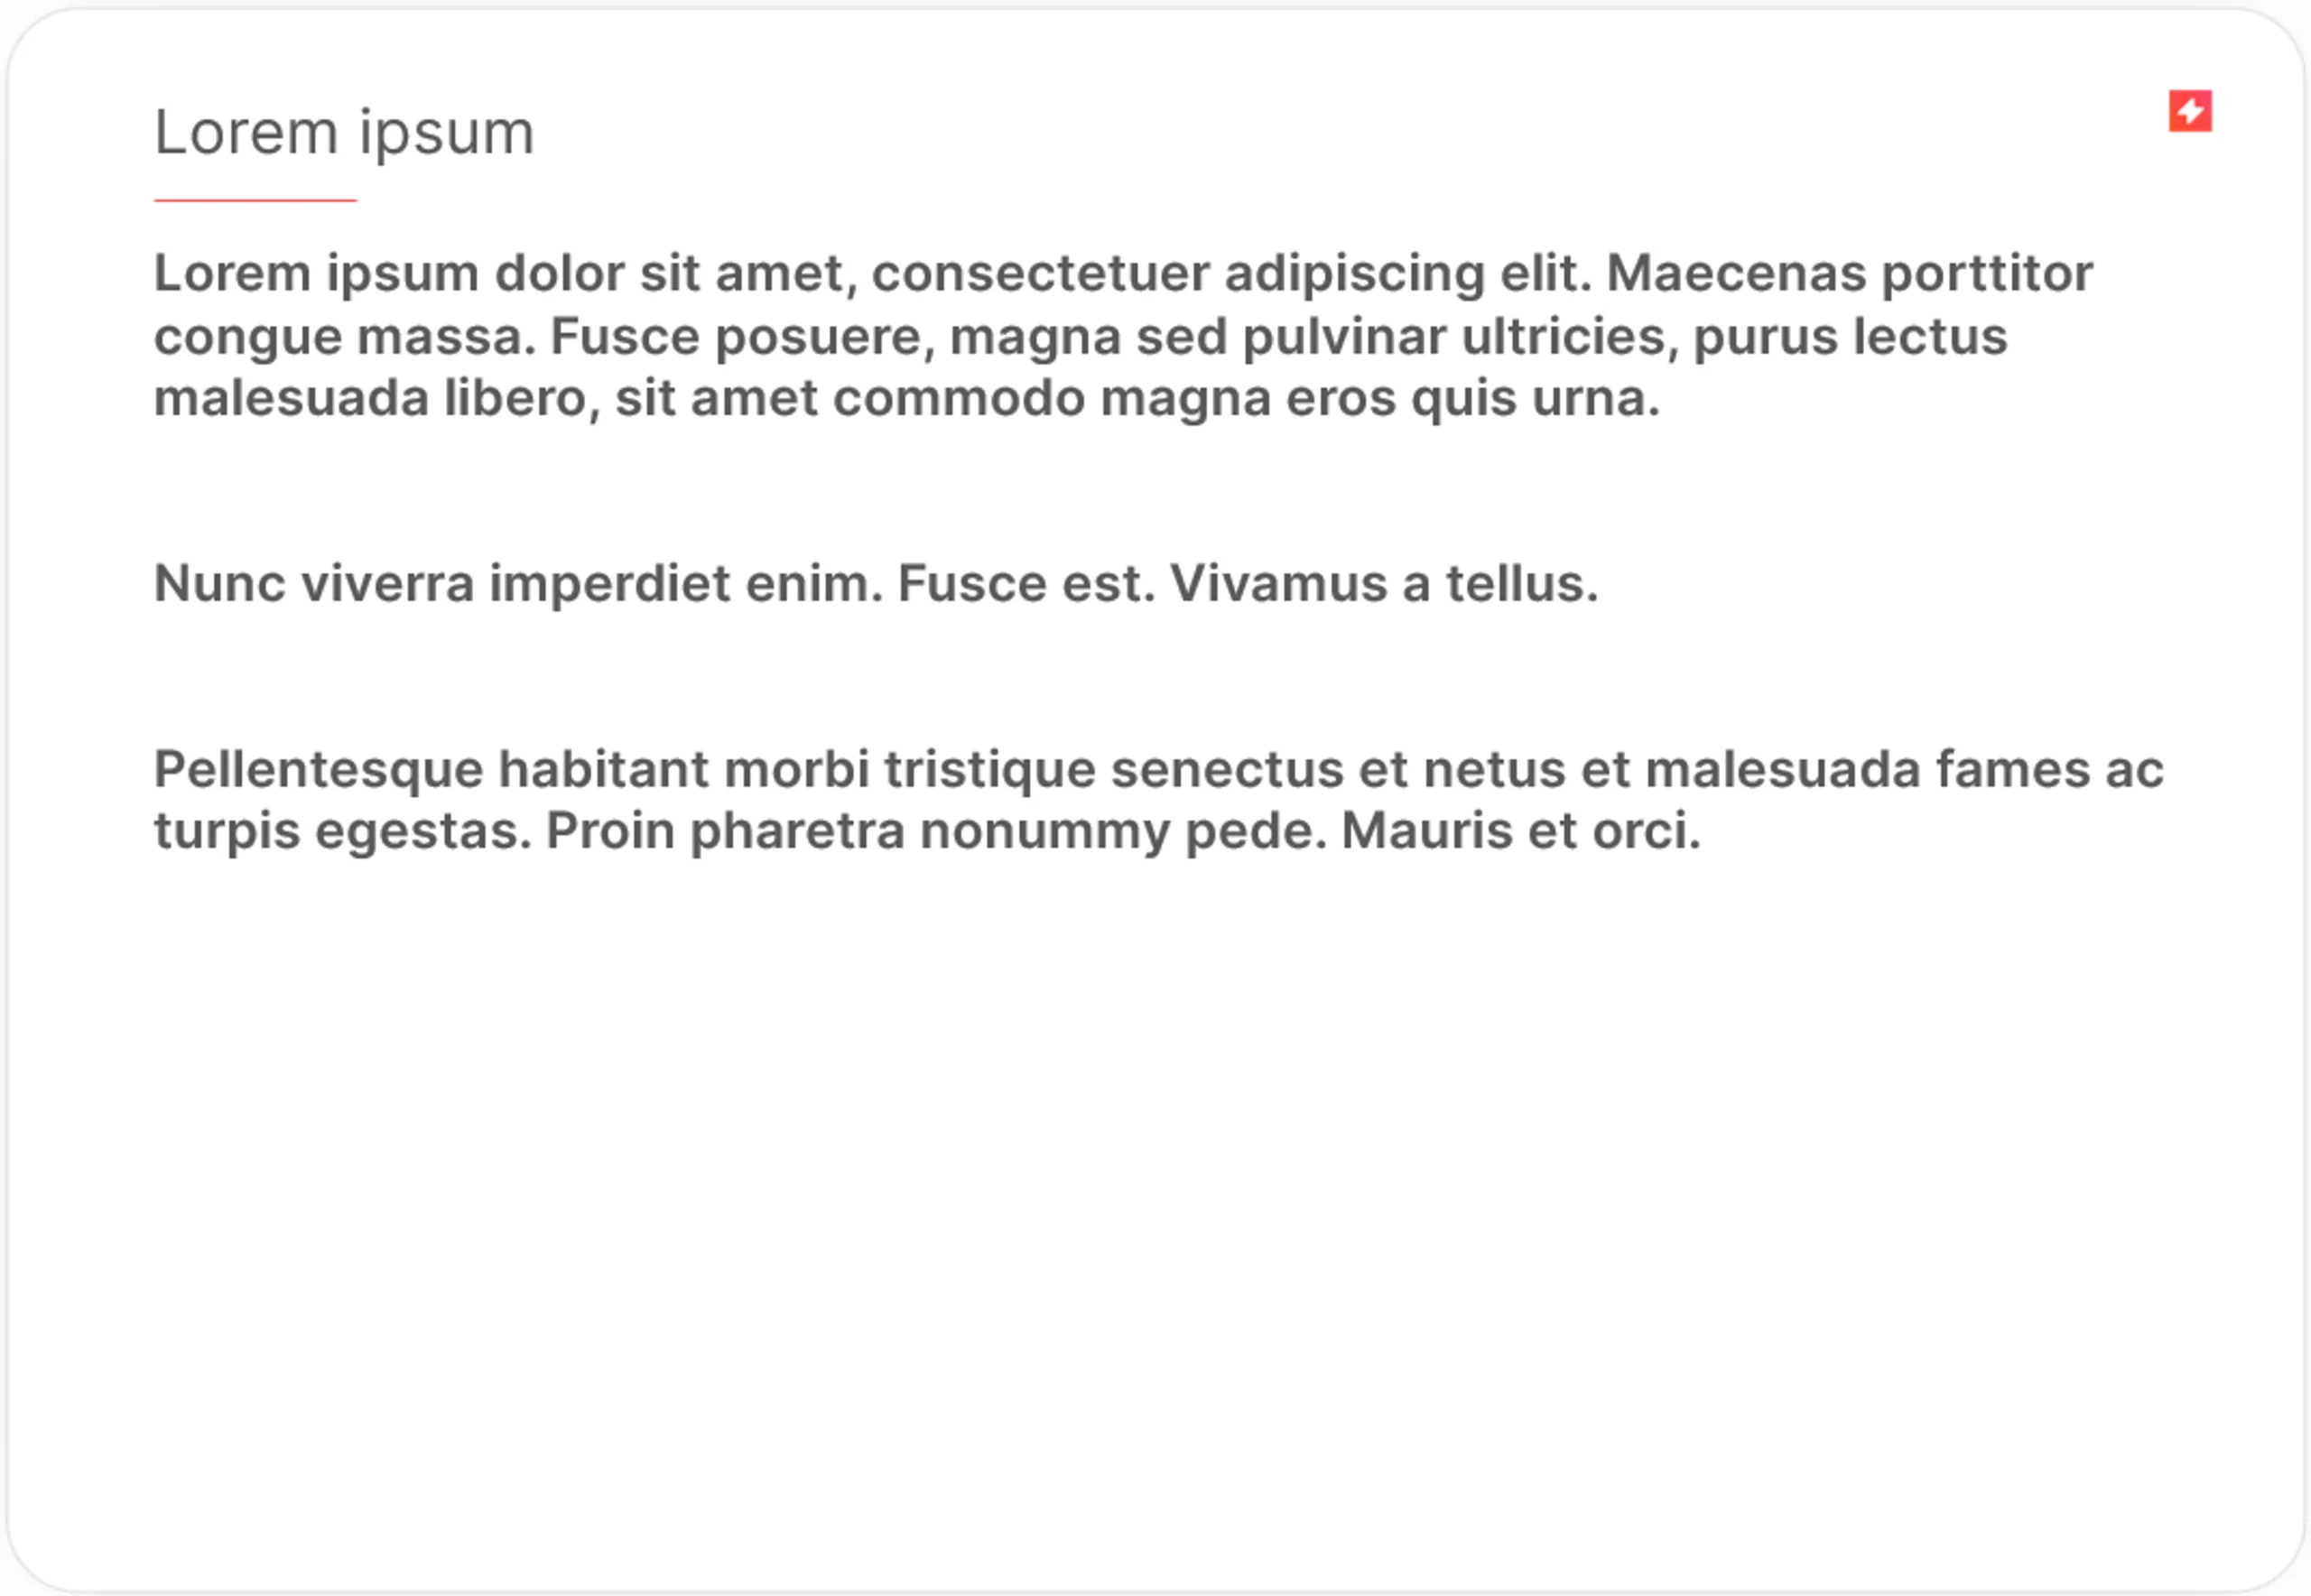
Ever wanted to mock up a slide with text, but didn’t have time to craft the copy yourself? This cool PowerPoint trick helps you generate placeholder text for your slides. To save time thinking of example text to fill a slide, you can generate the famous lorem ipsum paragraph directly within PowerPoint!
How to generate lorem ipsum text in PowerPoint:
Just pick any shape, type =lorem(x) (where x is the number of paragraphs you desire) and hit Enter. Alternatively, you can use the =rand(x,y) function instead. Type =rand(2,3) to generate 2 paragraphs with 3 sentences each. Your shape will automatically be filled with random text!
Insert Screenshots from within PowerPoint
If you’re regularly inserting screenshots of your company’s website or Power BI dashboards, this PowerPoint trick makes it easy to grab screenshots from other windows on your PC.
How to use the Screenshot function in PowerPoint:
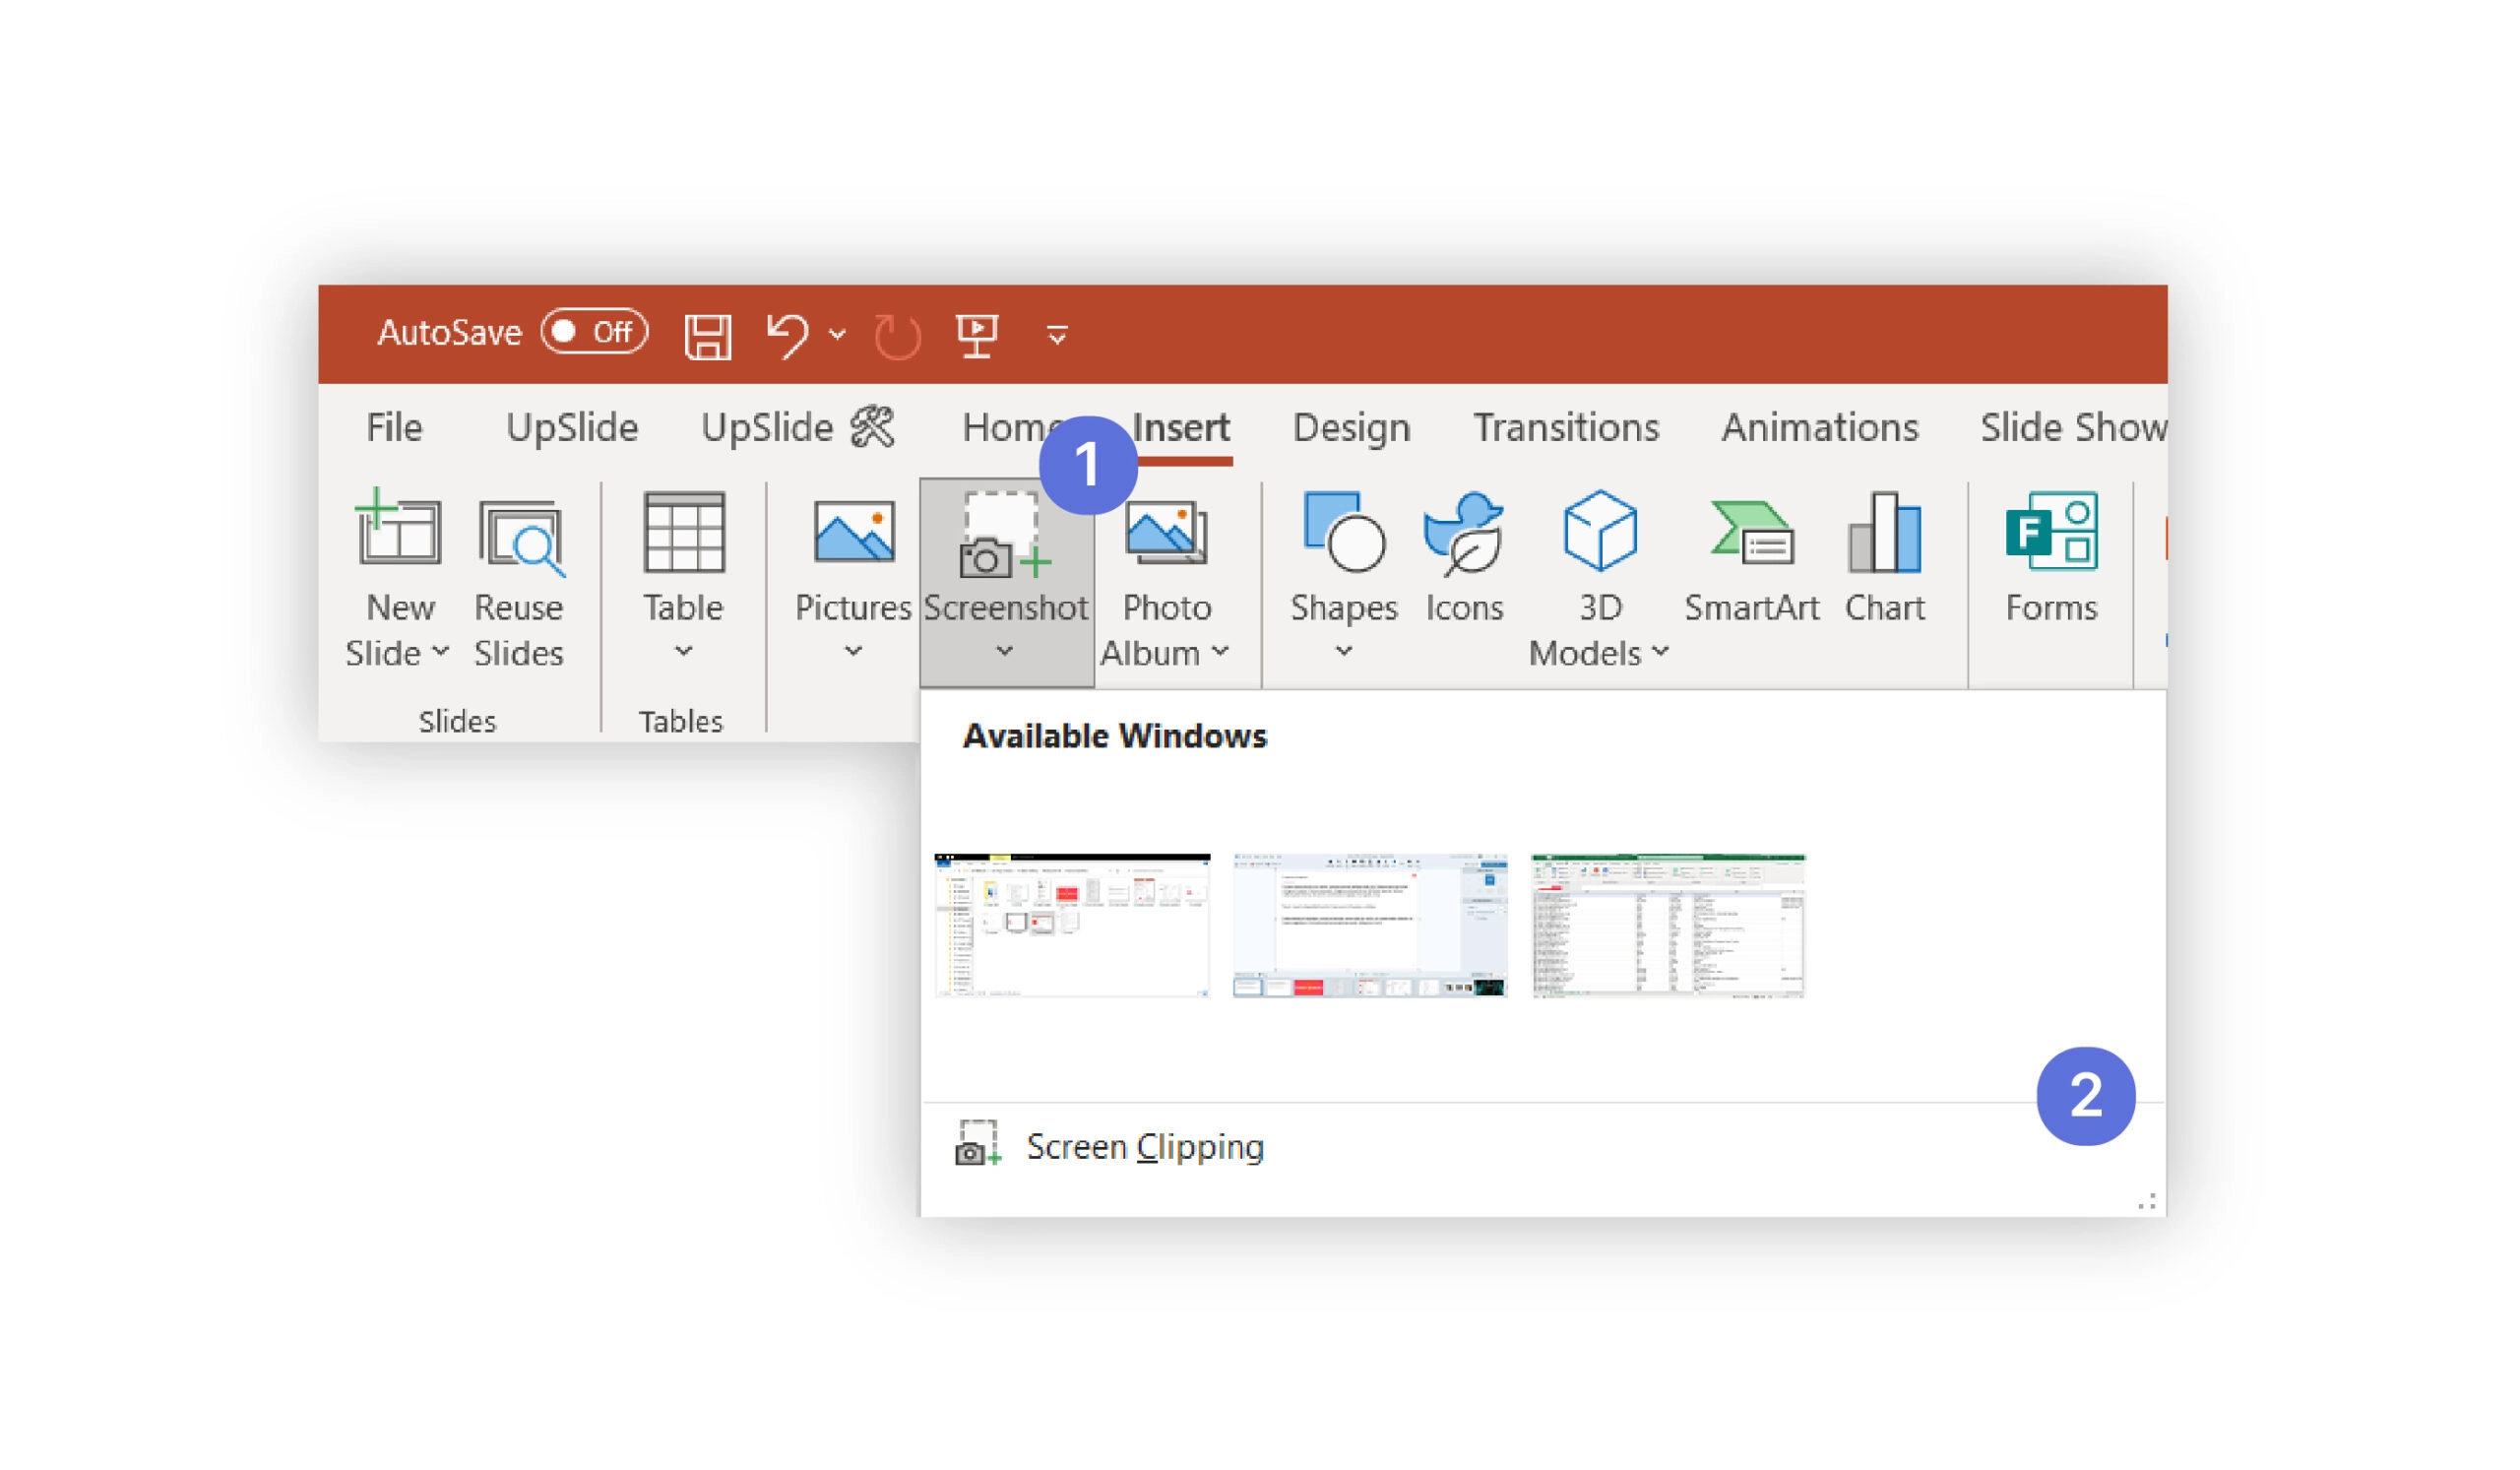
On the Insert tab, click the Screenshot icon, and you will see a thumbnail of each of your open windows. Select one of the open windows and then resize it to the desired dimensions – this will drop a screenshot into the slide you are editing.
If you want to add dynamic visuals from your Power BI dashboard to PowerPoint, discover UpSlide’s Power BI to PowerPoint Link >
Increase the Undo Limit
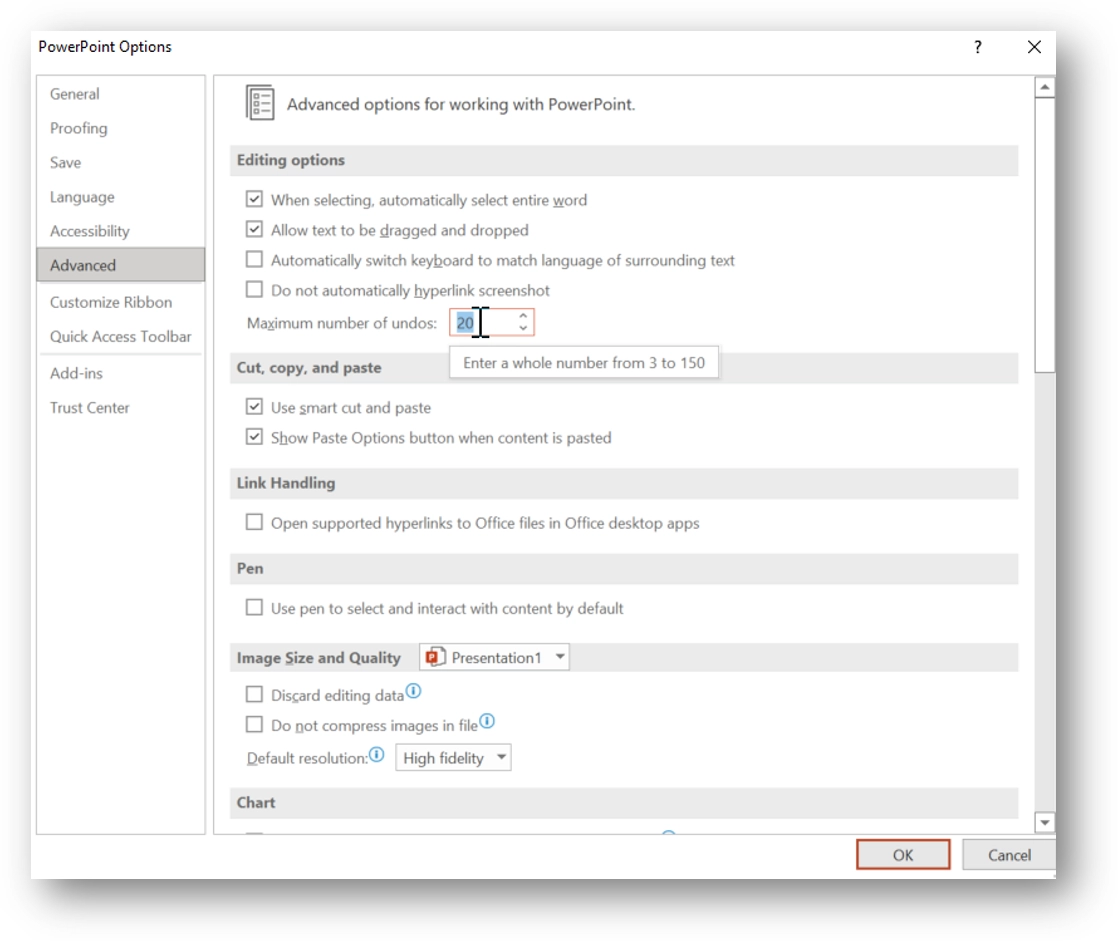
Have you ever made multiple mistakes and wanted to undo your recent actions in PowerPoint? If so, you have probably discovered that you can only use this function twenty times. After that, you have to reverse the changes manually. This can be time-consuming and disruptive to your workflow. The good news is, you can easily increase the limit on the Undo function with this useful trick for PowerPoint.
How to increase the Undo limit in PowerPoint:
Click on the File tab -> Options, and in the Advanced section, you will find the Editing options where you can increase or decrease the maximum number of times you can use the Undo function. The minimum number of clicks is 3 and the maximum is 150. However, before you increase it up to 150 clicks, bear in mind that this can reduce performance and slow down PowerPoint.
Create Custom Autocorrect Shortcuts
The Autocorrect feature in PowerPoint is usually used to correct regular spelling and punctuation errors – e.g., omitting capital letters at the start of a sentence. But did you know you can create custom shortcuts that will be used by Autocorrect in PowerPoint? If you are regularly typing long phrases in your presentations, this is the PowerPoint trick for you.
How to create custom Autocorrect shortcuts in PowerPoint:
Go in the PowerPoint Options -> Proofing -> Autocorrect Options. There, you can enter new combinations of characters to replace a word or phrase of your choice. For example, if you want to type “due diligence questionnaire” in a presentation, you just need to type “DDQ” and press the space bar, the Autocorrect tool will do the rest. This PowerPoint trick also works when inserting full sentences.
UpSlide’s Pro Design Tips for PowerPoint
PowerPoint offers many ways to make your slides eye-grabbing, with animations, flashing text, etc. Avoid the temptation to overdo it with effects and focus instead on simple design basics. Here are UpSlide’s pro design tips for creating powerful presentations in PowerPoint:
• Choose a sans serif font for body text: Sans serifs (like Arial, Helvetica, or Calibri) tend to be the easiest to read on screens. If your company’s graphic charter offers several fonts, choose the simplest one.
• Use dark text on a light background: This makes everything much easier to read. If your standard template uses a dark background, use light text (white, cream, light grey, or pastels) and slightly increase the font size.
• Align text left: Centered text can be difficult to read for long paragraphs. It is best reserved for important, impactful quotes. We recommend left-aligning your slides’ body text: this will look neat and be much easier to follow.
• Avoid clutter: A headline, a few bullet points, an image – anything more than this and you risk overwhelming your audience.
Discover our 8 design tips for PowerPoint >
BONUS: Perfect Your Presentation with Slide Check
Nobody’s perfect. Especially when it comes to creating high-quality, on-brand presentations in PowerPoint. That’s why we created Slide Check: your last defense against errors in PowerPoint.
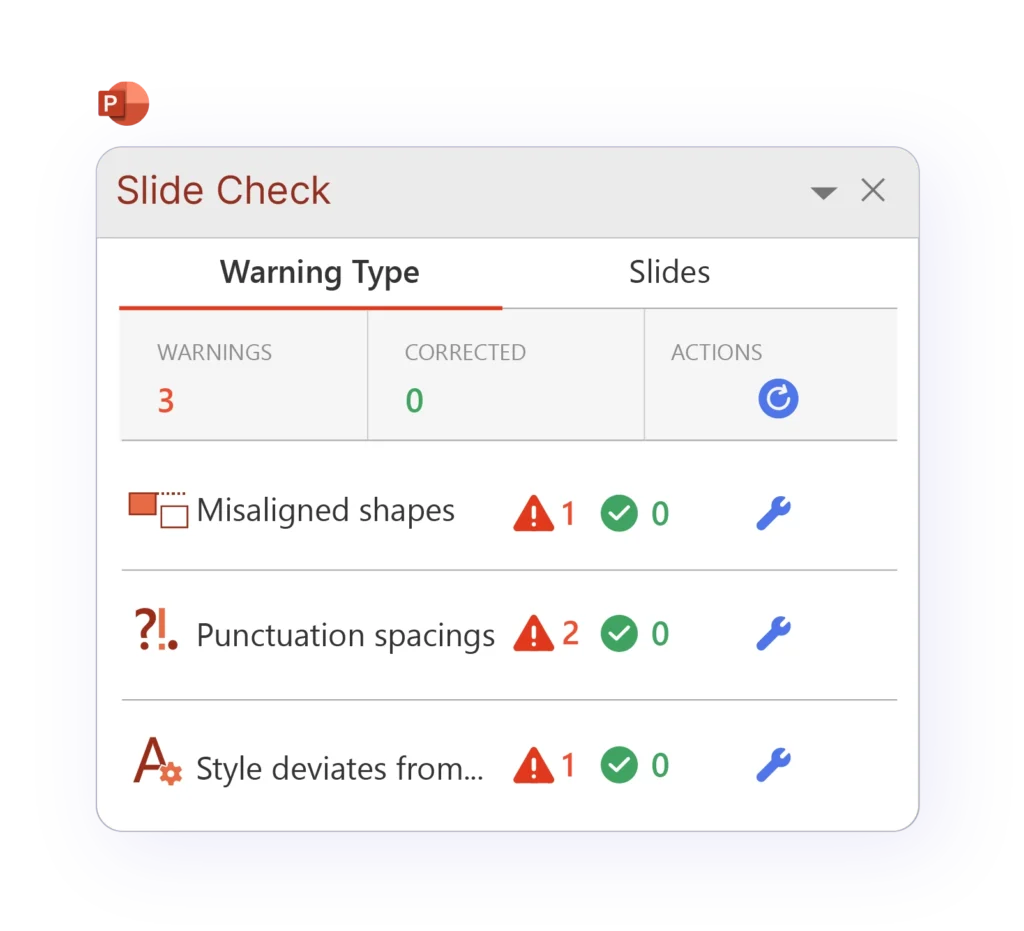
In one click, UpSlide’s Slide Check tool reviews your presentation to ensure your content is up-to-date, best-practice and on-brand. It can check for misaligned elements, empty placeholders, outdated text and more.
Discover more about Slide Check >
